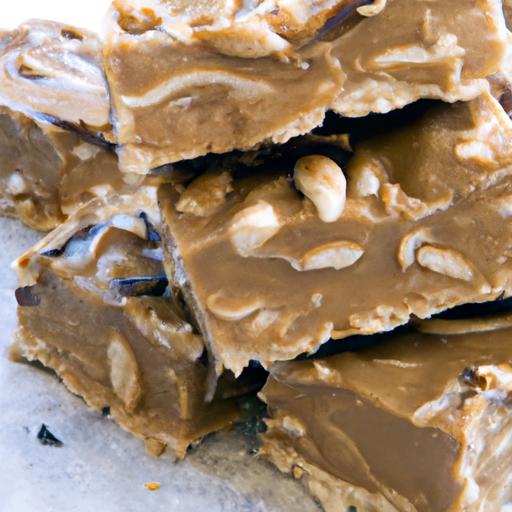
When hunger strikes and energy dips, reaching for a speedy, nutritious snack can make all the difference. Enter the world of no-bake peanut butter protein bars - the perfect blend of creamy, nutty goodness and muscle-fueling power, crafted without ever turning on the oven. Whether you’re a busy professional, a dedicated athlete, or simply someone craving a wholesome treat, these easy-too-make bars pack a punch of protein and flavor in every bite.
In this article, we’ll guide you through a simple recipe that transforms everyday pantry staples into a flavorful, energy-boosting snack that’s ready whenever you are. Get ready to power up your day with a recipe that’s as convenient as it is satisfying!
Power Up with easy no-bake peanut butter protein bars that perfectly fit into busy lifestyles, providing a quick energy boost and balanced nutrition without the hassle of baking. Inspired by my own need for fast, wholesome snacks during hectic days, these bars pack a punch of flavor and essential nutrients, making them an indispensable go-to for on-the-move nourishment. Their creamy peanut butter base combined with protein-rich ingredients fuels your day while satisfying that sweet and salty craving.
Prep and Cook Time
Preparation: 10 minutes
Setting time: 1-2 hours (no baking required)
Yield
Approximately 12 bars (depending on size)
Difficulty Level
Easy - no baking skills needed
Ingredients
- 1 cup natural creamy peanut butter (no sugar added)
- 1/3 cup honey or pure maple syrup for vegan option
- 2 cups rolled oats (gluten-free if desired)
- 1 cup vanilla whey or plant-based protein powder
- 1/2 cup chopped nuts (almonds, walnuts, or pecans)
- 1/4 cup mini dark chocolate chips (optional)
- 1 tsp pure vanilla extract
- 1/4 tsp sea salt
Instructions
- Prepare your pan: Line an 8×8-inch square pan with parchment paper, leaving an overhang on the sides for easy removal of bars later.
- Mix the wet ingredients: In a large bowl, combine peanut butter, honey (or maple syrup), and vanilla extract. Stir until smooth and well blended.
- Add dry ingredients: Gradually fold in the rolled oats, powder, chopped nuts, sea salt, and chocolate chips if using. Mix thoroughly until the mixture is thick but manageable.
- Press mixture into pan: Transfer the mixture into the prepared pan. Use a spatula or your hands (clean or lightly oiled) to press it firmly and evenly, ensuring compact bars after setting.
- Chill to set: refrigerate for at least 1 hour until the bars firm up. For quicker results, you can freeze for 20-30 minutes.
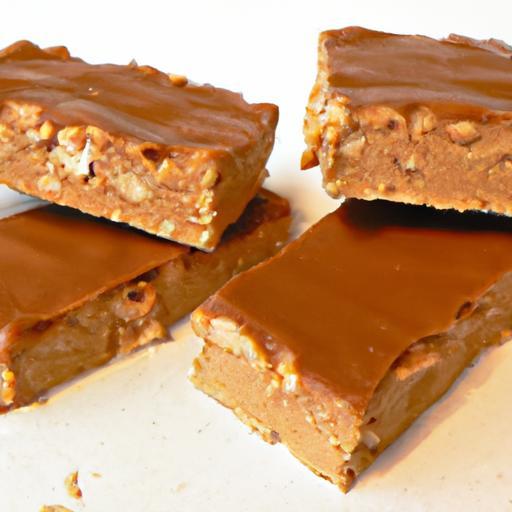
- Cut and store: Lift the set mixture using the parchment overhang and cut into 12 bars. Store in an airtight container in the refrigerator for up to a week or freeze for longer freshness.
Tips for Success
- Consistency check: If your mixture feels too dry, add a teaspoon of water or almond milk gradually. Too sticky? Add a tablespoon more oats or protein powder.
- Custom sweeteners: Swap honey with agave, brown rice syrup, or mashed banana to tailor sweetness and texture.
- Make ahead: these bars keep well and actually develop deeper flavor when rested overnight.
- Protein powder options: Vanilla whey works well, but plant-based or collagen protein powders are excellent alternatives.
- Nut-free version: Substitute chopped nuts with pumpkin seeds or sunflower seeds for similar crunch without allergens.
Serving Suggestions
Serve these bars chilled or at room temperature for a satisfying snack. For an inviting presentation, sprinkle additional chopped nuts or a few cacao nibs on top before pressing into the pan. Pair them with a tall glass of almond milk or your favorite energizing green tea to create a balanced snack break that fuels focus and stamina.

| Nutrient | Per Bar (12 bars) |
|---|---|
| calories | 210 |
| Protein | 12g |
| Carbohydrates | 18g |
| Fat | 11g |
choosing the Perfect Ingredients for Maximum Nutrition and Flavor
Every component in this recipe is carefully selected to balance taste and nourishment. Using natural peanut butter ensures you get heart-healthy fats and protein without added sugars. Rolled oats provide complex carbohydrates for sustained energy, while high-quality protein powder boosts muscle recovery and fullness. Adding chopped nuts introduces a crunchy texture and extra micronutrients, all coming together for a robust, flavorful treat.
Step-by-Step Guide to Mixing and Setting Your Peanut Butter Protein Bars
Start by gently combining the creamy peanut butter and honey until silky smooth. This step is key to creating a luscious base that holds the bars together. When folding in dry ingredients, be deliberate but gentle to keep the texture cohesive without crumbling. Firmly press the mixture into a lined pan-this compression stage ensures bars that won’t fall apart. Lastly, allow ample time to chill, transforming the mixture into perfectly set protein bars ready to power you through busy days.
Creative Variations to Customize Your Power-Packed snacks
Feeling adventurous? swap the peanut butter for almond or cashew butter for a subtle twist. Try mixing in dried fruits like cranberries or chopped dates for bursts of sweetness. For an indulgent layer, drizzle melted dark chocolate over set bars before refrigerating. Spice lovers can add a pinch of cinnamon or cayenne for warmth and kick. Each modification creates a unique flavor profile while keeping the core benefits intact-making your no-bake peanut butter protein bars truly your own.
For more energizing snack ideas, check out our Guide to Homemade Energy Balls. To understand why protein is vital for busy lifestyles, visit EatRight.org’s comprehensive protein guide.
Q&A
Q&A: Power Up with Easy No-Bake Peanut Butter Protein Bars
Q1: What makes these peanut butter protein bars a great snack choice?
A1: These bars pack a protein punch without the hassle of baking, making them the perfect grab-and-go fuel. The creamy peanut butter adds satisfying richness while providing steady energy, ideal for workouts or mid-day slumps.
Q2: How simple is the preparation process?
A2: Super simple! No oven, no elaborate steps. Mix your ingredients, press into a pan, chill, and you’re ready to power up. Even beginners in the kitchen will breeze through this recipe.
Q3: Can I customize the bars to fit my dietary needs?
A3: Absolutely! swap out the protein powder for your preferred type-whey, plant-based, or collagen. Add mix-ins like dark chocolate chips or dried fruit to keep things exciting and tailor the flavor to your taste buds.
Q4: How long do these bars stay fresh?
A4: Stored in an airtight container in the fridge, these bars stay fresh for up to a week, making them a reliable fuel source for busy days. You can also freeze them for longer shelf life without losing that chewy texture.
Q5: Are these bars suitable for kids and picky eaters?
A5: Definitely! The naturally sweet peanut butter flavor appeals to most palates, and with no bitter protein aftertaste, it’s a crowd-pleaser. Plus, they’re a smart option to sugary snacks.
Q6: What ingredients give these bars their protein boost?
A6: The combo of peanut butter and your chosen protein powder is the dynamic duo here. Additionally, oats contribute complex carbs and a bit of extra protein, rounding out this balanced bite.
Q7: Can these bars help with weight management or muscle building?
A7: Yes! they offer a controlled portion of protein and healthy fats, which can help keep hunger at bay and support muscle recovery. Perfect as a post-workout snack or a wholesome treat between meals.
Q8: Any tips to make sure my bars hold together well?
A8: Press the mixture firmly into the pan and let it chill long enough to set properly-usually at least two hours. This ensures each bar stays intact instead of crumbling apart. With this easy no-bake peanut butter protein bars recipe, powering up has never tasted this effortless or delicious!
Future Outlook
And there you have it-a simple, no-fuss way to fuel your day with delicious, homemade peanut butter protein bars. Whether you’re gearing up for a workout, powering through an afternoon slump, or just craving a wholesome snack, these bars pack a punch of energy without ever needing the oven. Easy to make, easy to love, and easy to customize-your new go-to recipe is ready to power up your snack game. So grab your ingredients, get mixing, and snack smart with every bite!