There’s something magically satisfying about twirling tender ribbons of pasta fresh from your own kitchen-especially when it’s crafted to fit your gluten-free lifestyle. Homemade gluten-free pasta isn’t just a meal; it’s an artful blend of tradition, creativity, and mindful nourishment. Navigating the world of gluten-free flours and dough can seem daunting at first, but with the right techniques and a little patience, you can create pasta that’s as delightful in texture as it is in taste.
In this step-by-step guide, we’ll unravel the secrets to making your very own gluten-free pasta from scratch, transforming simple ingredients into a comforting, customizable culinary masterpiece. Whether you’re a seasoned cook or a curious beginner, get ready to roll up your sleeves and dive into the rewarding process of crafting pasta that’s uniquely yours.
Crafting Homemade Gluten-Free Pasta is an art that combines culinary tradition with modern dietary needs, bringing the joy of fresh, tender pasta to everyone’s table. Choosing the right gluten-free flours is the cornerstone of pasta perfection, transforming the dough into a supple, elastic base that’s easy to work with and delightful to eat. Rooted in the heritage of Italian cooking but reimagined for gluten-free diets, this process lets you savor each bite of authentic, homemade pasta without compromise.
Prep and Cook Time
- Readiness: 30 minutes
- Resting: 45 minutes
- cooking: 3-5 minutes
- Total Time: Approximately 1 hour 20 minutes
Yield
Serves 4 as a satisfying main course
Difficulty Level
Medium – ideal for cooks ready to explore gluten-free dough techniques
Ingredients
- 1 cup brown rice flour, finely milled
- 1/2 cup tapioca starch (not flour)
- 1/4 cup potato starch
- 1 teaspoon xanthan gum (for dough elasticity)
- 1/2 teaspoon fine sea salt
- 3 large eggs (room temperature)
- 1 tablespoon olive oil (extra virgin for flavor)
- 2-3 tablespoons warm water (adjust as needed)
Instructions
- Combine Dry Ingredients: In a large bowl, whisk together brown rice flour, tapioca starch, potato starch, xanthan gum, and sea salt. This blend provides the structure and elasticity needed for gluten-free pasta dough.
- Create a Well: Make a well in the center of the flour mixture and crack the eggs into it. Add the olive oil. Gently whisk the eggs and oil together, then gradually incorporate the flour from the edges using a fork.
- Knead the Dough: Once combined, use your hands to knead the dough in the bowl. If it’s too crumbly, slowly add warm water, one tablespoon at a time, until it forms a smooth, pliable dough. Avoid over-wetting.
- Rest the Dough: Wrap the dough in plastic wrap and let it rest at room temperature for 45 minutes. This step hydrates the flours fully and improves elasticity.
- Prepare the Work Surface: Lightly dust a clean surface with tapioca starch to prevent sticking. Divide the dough into four equal portions for easier handling.
- Rolling the Dough: Using a rolling pin, flatten one portion into a thin sheet approximately 1/8 inch thick. Turn and dust lightly with starch as needed to prevent adhering.
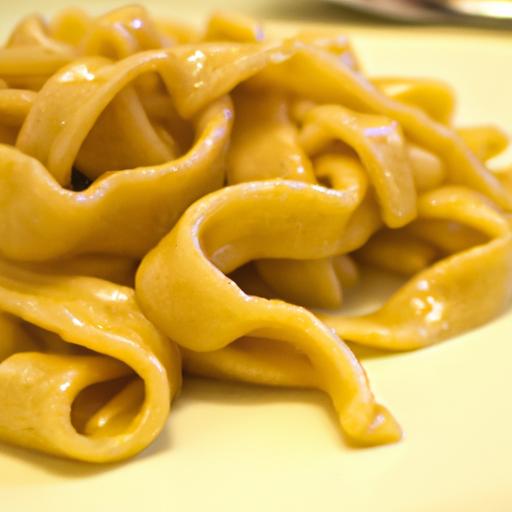
- Shaping: For fettuccine, carefully roll the dough sheet loosely and slice into 1/4-inch strips with a sharp knife. For shapes like orecchiette or cavatelli, pinch and shape with your fingers for rustic authenticity.
- Cooking: Bring a large pot of salted water to a rolling boil. Drop pasta in batches, stirring gently to avoid sticking. Fresh gluten-free pasta cooks quickly-about 3 to 5 minutes or until tender but firm.
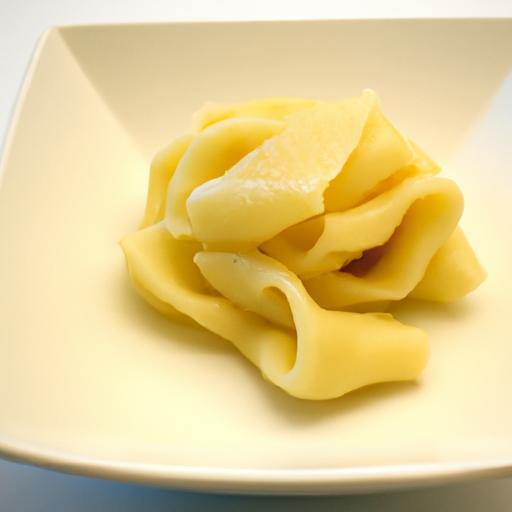
- drain and Serve: Once cooked, immediately drain and toss with your favorite sauce or olive oil to prevent the pasta from drying out or sticking together.
Chef’s Notes: Tips for Success
- Flour Variations: Feel free to experiment with certified gluten-free flours like sorghum or millet for subtle flavor differences, but maintain the starch ratio for texture.
- Texture Check: The dough should
- be slightly tacky but not sticky; if too sticky, sprinkle with a pinch more tapioca starch.
- Resting is Crucial: Don’t skip the resting phase-it allows starches to hydrate and xanthan gum to develop elasticity, giving a more conventional chew.
- Rolling Tips: Roll gently and always dust with starch-gluten-free dough is fragile and tears easily if overstretched.
- Make-Ahead: Pasta dough can be refrigerated for up to 24 hours, wrapped tightly; bring back to room temperature before rolling.
- Freezing: Shape pasta, freeze on a parchment-lined tray until firm, then transfer to resealable bags. Cook from frozen, adding extra minute to boiling time.
Serving Suggestions
Serve your homemade gluten-free pasta with a vibrant roasted cherry tomato & basil sauce or a rich garlic and sage brown butter drizzle. Garnish generously with freshly grated Parmigiano-Reggiano and a sprinkle of toasted pine nuts for texture. A handful of fragrant herbs like parsley or oregano makes a colorful, aromatic finish that elevates every bite.

| Nutrient | Per Serving (Approx.) |
|---|---|
| Calories | 320 |
| Protein | 11g |
| Carbohydrates | 58g |
| Fat | 5g |
To deepen your pasta prowess, explore our detailed guide on gluten-free pasta sauces and master the art of pairing sauces that celebrate your freshly crafted pasta’s texture and flavor.
Q&A
Q&A: Crafting Homemade Gluten-Free Pasta – A Step-by-Step Guide
Q1: Why choose homemade gluten-free pasta over store-bought varieties?
A1: Homemade gluten-free pasta allows you full control over ingredients, ensuring freshness and avoiding unwanted additives. Plus, crafting it yourself unlocks endless flavor and texture possibilities tailored to your taste buds and dietary needs. It’s a culinary adventure that transforms a simple meal into an artful celebration!
Q2: What are the key ingredients needed for gluten-free pasta dough?
A2: The magic starts with a blend of gluten-free flours-commonly rice flour, tapioca starch, and sometimes chickpea or sorghum flour. Add xanthan gum or psyllium husk to mimic gluten’s elasticity, eggs (or egg substitutes), a pinch of salt, and a drizzle of olive oil for that silky touch. Each ingredient plays a starring role in creating the perfect dough harmony.
Q3: How do you achieve the right dough texture without gluten?
A3: Gluten-free dough is a delicate balance-a bit more hydration and gentle handling are your allies. Start by mixing dry ingredients thoroughly, then gradually add wet ingredients, kneading lightly until the dough feels pliable but not sticky. Resting the dough for 20-30 minutes allows the flours to hydrate fully, improving elasticity and workability.
Q4: Can I roll out gluten-free pasta dough like traditional pasta?
A4: Absolutely! though it’s a tad more fragile, gluten-free pasta dough can be rolled out on a lightly floured surface or between sheets of parchment paper to your desired thinness. Using a pasta machine or rolling pin, go slow and steady-think graceful art rather than athletic sprint. Dust with flour as needed to prevent sticking.
Q5: What shapes work best for gluten-free pasta?
A5: Ribbon shapes like fettuccine, tagliatelle, or even wide pappardelle are forgiving and showcase the dough’s texture beautifully. Smaller shapes like orecchiette or gnocchi require more finesse but are definitely achievable with practice. the key is to avoid overly intricate shapes that demand dough elasticity gluten-free blends can’t offer.
Q6: How do I cook gluten-free pasta without it turning mushy?
A6: Cook it in generously salted boiling water, but keep a keen eye-gluten-free pasta cooks faster and is more sensitive. Typically, 2-4 minutes is plenty; al dente is your goal. Stir gently to prevent sticking, and drain promptly. Rinsing is usually unnecessary, as it can wash away flavors, but a quick toss with olive oil post-cooking keeps strands lovely and separate.
Q7: Any tips for enhancing flavor in gluten-free pasta?
A7: Infuse the dough itself! Add fresh herbs like basil or rosemary, a hint of garlic powder, or even a splash of beet or spinach juice for color and subtle taste. Serving with bold sauces-think rich tomato ragù, herby pesto, or a creamy mushroom blend-complements and elevates your gluten-free masterpiece.
Q8: How can beginners avoid common pitfalls when making gluten-free pasta?
A8: Patience is paramount. Don’t rush the mixing or rolling process, and accept that the dough’s texture differs from traditional pasta-less stretchy, more tender. use a reliable flour blend designed for pasta, rest the dough adequately, and keep surfaces well-floured. Practice transforms these little challenges into triumphs on your dinner plate.
Q9: Is gluten-free pasta suitable for freezing?
A9: Yes! After shaping, arrange pasta strands or shapes on parchment-lined trays and freeze until firm. Transfer to airtight containers or bags, and cook straight from frozen-just add a minute or two to the boiling time. This shortcut keeps your flavorful homemade pasta ready for whenever hunger strikes.
Q10: What makes homemade gluten-free pasta so rewarding?
A10: Beyond the health benefits and tailored flavors, it’s the joy of creation-the tactile dance of flour and egg, the rewarding transformation under your hands, and the proud moment of serving a lovingly crafted dish. It’s a gateway to creative cooking and a heartfelt embrace of nourishment that celebrates both tradition and innovation.
The Conclusion
Embarking on the journey of crafting homemade gluten-free pasta opens a world where tradition meets innovation – where every bite tells a story of patience, creativity, and care. With the right ingredients, a dash of technique, and this step-by-step guide in hand, you’re well-equipped to transform simple dough into a delicious, safe, and satisfying meal that honors both taste and dietary needs. So roll up your sleeves, flour your workspace, and let the art of gluten-free pasta-making bring a fresh, wholesome twist to your kitchen repertoire. Your taste buds (and tummy) will thank you.