There’s something undeniably magical about the perfect pizza crust-the light, airy texture that yields just the right amount of chewiness, the golden edges that crisp up beautifully in the oven. But for those navigating the world of gluten-free baking, capturing that elusive fluffiness and effortless ease in a yeast-based pizza crust can feel like a lofty quest.
Enter our fluffy & easy gluten-Free Yeast Pizza Crust Recipe Guide, where science meets simplicity and every bite promises the classic pizza experience without the gluten. Whether you’re a seasoned gluten-free baker or simply craving a homemade pie that rivals your favorite pizzeria, this guide is your trusted companion to mastering the art of soft, airy, and irresistibly delicious gluten-free pizza crusts-no compromise necessary.
Fluffy & Easy Gluten-Free Yeast Pizza Crust Recipe Guide unlocks the secrets to crafting the perfect pizza dough that’s both soft and chewy, without the gluten. From mixing the ideal flour blend to mastering yeast activation, this guide is your gateway to bakery-quality crusts that impress every bite. Imagine a crust with a tender crumb that rises beautifully and crisps just right along the edges-this is the science and art wrapped into one delicious experience.
Prep and cook Time
- Preparation: 20 minutes
- Rising Time: 1 hour 15 minutes
- Baking: 15 minutes
- Total Time: Approximately 1 hour 50 minutes
Yield
Serves 2 medium-sized pizzas (8-10 inch each)
Difficulty Level
Medium – beginner-friendly with a little patience for yeast rising
Ingredients
- 2 cups gluten-free all-purpose flour (preferably one with xanthan gum included)
- 1/2 cup tapioca starch for chewiness and stretch
- 1 packet (2 1/4 tsp) active dry yeast
- 1 cup warm water (105°F to 110°F, ideal for yeast activation)
- 1 tbsp olive oil (plus extra for greasing)
- 1 tsp sugar to feed the yeast
- 1 tsp salt
- 1 tsp apple cider vinegar to improve structure
Step-by-Step Instructions
- activate the yeast: In a small bowl, combine the warm water and sugar. Sprinkle the active dry yeast on top and stir gently. Wait 8-10 minutes until foamy. A properly activated yeast mixture should bubble and expand,signaling its readiness.
- Mix dry ingredients: In a large bowl, whisk together gluten-free all-purpose flour, tapioca starch, and salt ensuring an even distribution for balanced texture.
- Combine wet ingredients: Pour the activated yeast mixture into the dry ingredients. Add olive oil and apple cider vinegar. Mix with a wooden spoon or dough hook attachment until a sticky, slightly elastic dough forms.
- Knead lightly: Turn the dough onto a lightly floured surface (using gluten-free flour) and knead gently for 2-3 minutes. This builds gluten-free dough structure without overworking it.
- First rise: Place dough in an oiled bowl and cover with a clean kitchen towel or plastic wrap. Let rise in a warm, draft-free spot for about 60 minutes, or until the dough has nearly doubled in size.
- Shape the crust: Punch down the dough gently to release air. Divide into halves for two small pizzas or keep whole for one large crust. Roll or stretch the dough onto a parchment-lined pizza stone or baking sheet, ensuring an even thickness and slightly raised edges for a light crust.
- Second rise (optional): Let the shaped dough rest for 15 minutes to develop a fluffier texture during baking.
- Bake: Preheat the oven to 475°F (245°C) with a pizza stone inside if possible. bake the crust alone for 7 minutes to set its structure, then add toppings and bake another 7-8 minutes until golden and bubbly.
Tips for Success
- Use warm water between 105°F and 110°F-too hot will kill yeast, too cold won’t activate it.
- For a softer, chewier crust, incorporate tapioca starch as it helps mimic gluten elasticity naturally.
- Don’t skip the apple cider vinegar; it boosts dough strength and tenderness by interacting with baking soda in some flour blends.
- If your dough feels too wet to handle, sprinkle additional gluten-free flour 1 tbsp at a time; if too dry, add warm water slowly.
- Giving your dough a pre-bake before adding toppings prevents sogginess and creates the ideal crust base.
- Use a pizza stone or steel surface inside your oven to simulate professional pizzeria heat for a crispy bottom crust.
- Make-ahead tip: The dough freezes beautifully. Shape and wrap tightly, defrost overnight in the fridge before rising again.
Serving Suggestions
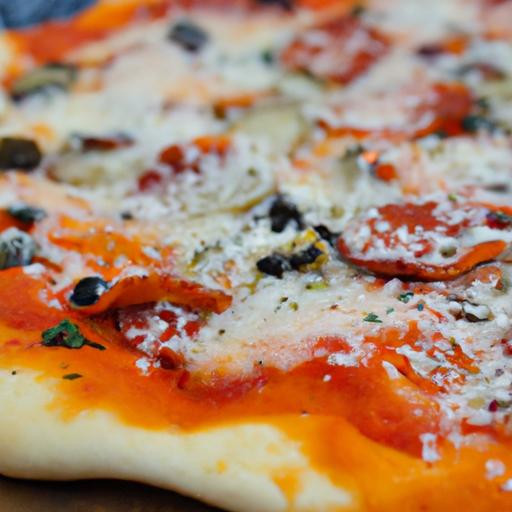
Present your gluten-free pizza crust topped with fresh tomato sauce, creamy mozzarella, basil leaves, and a drizzle of extra virgin olive oil for a traditional taste. For visual flair and extra flavor, sprinkle chili flakes or shaved parmesan before serving. Pair with a crisp arugula salad and a glass of chilled white wine for an elegant meal.
Leftovers make excellent handheld pizza pockets or mini calzones-reheat at 375°F until crisp on the outside.

Nutrition Details per Serving
| Nutrient | Amount |
|---|---|
| Calories | 220 kcal |
| Protein | 5 g |
| Carbohydrates | 43 g |
| Fat | 4 g |
For deeper insights into gluten-free baking chemistry, visit King Arthur Baking’s gluten-free guide. Also,explore our comprehensive gluten-free dough recipes for more crowd-pleasing options.
Q&A
Q&A: Fluffy & Easy Gluten-Free Yeast Pizza Crust Recipe Guide
Q1: Why choose a yeast-based gluten-free pizza crust over other types?
A1: Yeast adds that classic airy and fluffy texture we all crave in a pizza crust, even when going gluten-free. Unlike swift-bake or baking powder crusts, yeast gives the dough time to develop flavor and rise beautifully, turning your homemade pizza into a chewy, pillowy masterpiece that rivals traditional wheat crusts.
Q2: what are the key challenges in making a gluten-free yeast pizza crust?
A2: Gluten is the protein that gives dough its elasticity and stretch. Without it, dough can be dense or crumbly. The challenge is balancing moisture, binding agents, and rising time to create a crust that’s soft inside yet crisp outside. Using the right blend of gluten-free flours and a patient rise helps achieve that perfect crust.
Q3: Which gluten-free flours work best for a fluffy yeast pizza crust?
A3: A mix is key! Popular choices include tapioca starch for stretch, brown rice flour for structure, and potato starch for moisture. Almond or oat flour can add flavor and tenderness. Combining these flours balances texture, ensuring your crust rises nicely without being gummy or dry.
Q4: How vital is proofing the yeast in this recipe?
A4: Crucial! Proofing activates the yeast, ensuring it’s alive and ready to work its magic. This step kickstarts the fermentation that creates air bubbles, resulting in a soft, spongy crust. Skipping or rushing proofing can lead to a dense, flat pizza base.
Q5: Can I make this pizza dough ahead of time?
A5: Absolutely! actually, letting the dough rest longer (even overnight in the fridge) enhances flavor and texture. Just cover it well to prevent drying out. When ready, bring it back to room temperature before shaping and baking for the best puff.
Q6: what’s the secret to getting a crispy bottom crust without gluten?
A6: High heat and a preheated baking surface are your best friends. Use a pizza stone or baking steel to transfer heat evenly and quickly. Also, brush the crust lightly with olive oil before adding toppings-this helps create a golden, crispy bottom while keeping the inside fluffy.
Q7: How do I prevent the dough from sticking during shaping?
A7: Dust your work surface and rolling pin with gluten-free flour or tapioca starch to keep the dough from sticking. Alternatively, shape the dough gently using your hands, stretching it slowly instead of rolling to preserve those lovely air pockets created by yeast.
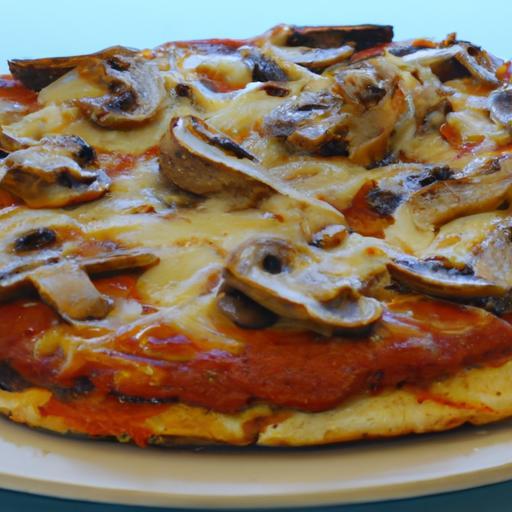
Q8: Can I customize this dough for different pizza styles?
A8: Definitely! For a thicker, focaccia-like crust, go for a longer rise and press the dough into a pan. For thin crust, roll thinner and bake at a higher temperature for less time. You can also mix in herbs or garlic powder for extra flavor.
Q9: Is this recipe suitable for keto or low-carb diets?
A9: Since it relies on starch-heavy flours, this yeast pizza crust isn’t low-carb. However, you can experiment by substituting some flours with almond or coconut flour, but expect some differences in texture and rise as yeast typically thrives on starches.
Q10: Any tips for first-timers baking yeast gluten-free pizza crust?
A10: Patience is key-give the dough enough time to rise and settle. Follow measurements carefully since gluten-free baking is less forgiving. Don’t be discouraged by initial attempts; with practice, you’ll perfect your fluffy and delicious gluten-free pizza crust that even wheat lovers will adore!
Concluding remarks
With this fluffy and easy gluten-free yeast pizza crust recipe in your culinary arsenal, you’re no longer confined by dietary restrictions or bland substitutes. Whether you’re crafting a classic Margherita or a bold veggie-loaded masterpiece, this crust promises the perfect foundation-airy, tender, and irresistibly satisfying. Embrace the art of gluten-free pizza with confidence and creativity, knowing that delicious, homemade pies are just a recipe away. So roll up your sleeves, fire up the oven, and let every slice be a festivity of flavor and texture that everyone at the table can enjoy.